Back to: Kiosk Users
Your agenda screen is the most important part of the Kiosk. You will spend most of your time in Jobman operating from the agenda screen, identifying tasks you need to complete, and logging time against those tasks.
Here are some guidelines for how to use your agenda screen.
User Column Control
Hover over any existing column heading, then click on the arrow icon:
If you click on Columns, you will see a second menu which shows all the possible columns which you can show/hide:
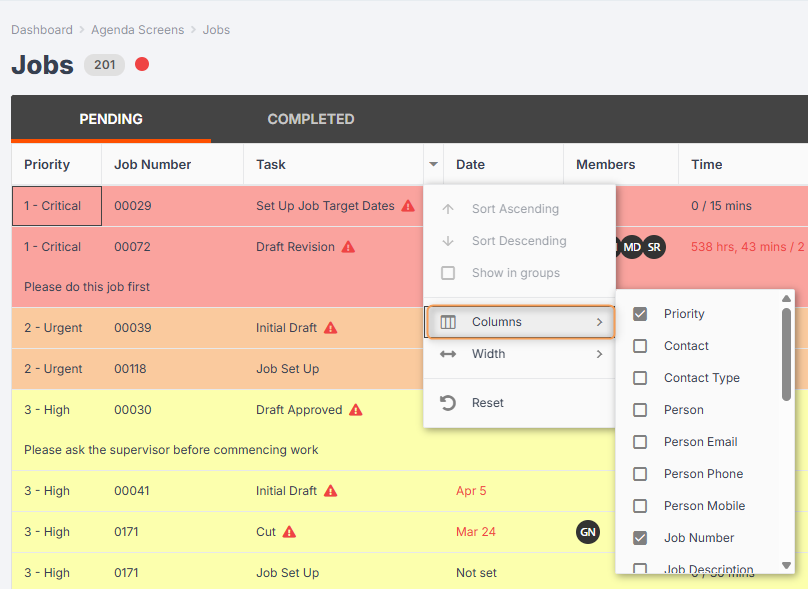
- Select the columns you wish to show, and deselect the columns you wish to hide.
- Your preferences will be saved when you return to this part of the software.
If you click on Width, you will see a second menu which shows all the possible settings to adjust your column widths:
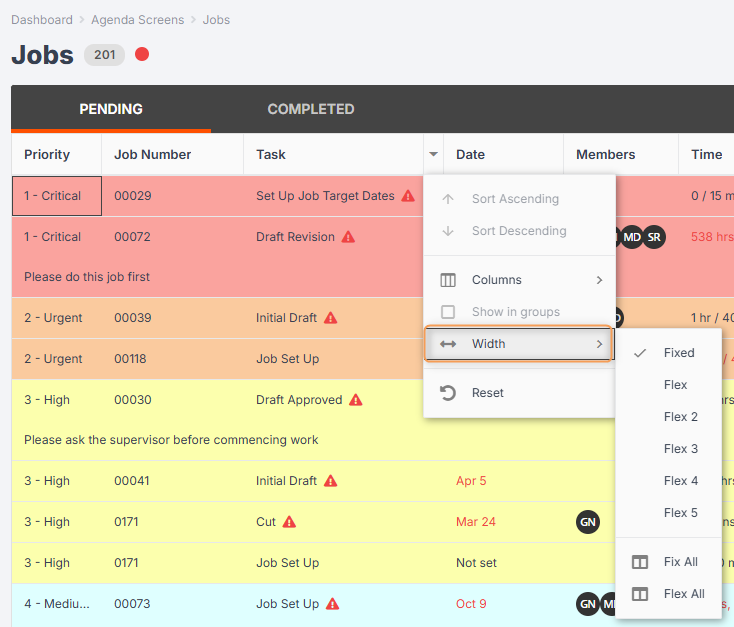
- The normal setting for column widths is Fixed, which means the column is set to a ‘fixed’ width, so if you have only a couple of columns visible, all the content will appear to the left of the grid, but if you have a lot of columns visible, you may have to scroll to the right to see the content:


- When you choose Flex All, it will attempt to fill the space by adjusting the width of the columns equally. No matter how much they adjust, the width of column 1 is the same as column 2.


This is handy because it reduces the need to constantly resize things to make them fit.
- If you want different columns to be different widths, you can use Flex 2, 3, 4, or 5. (Read More)
- You can also click and drag any of the lines that separate column headings to expand or narrow an individual column width.
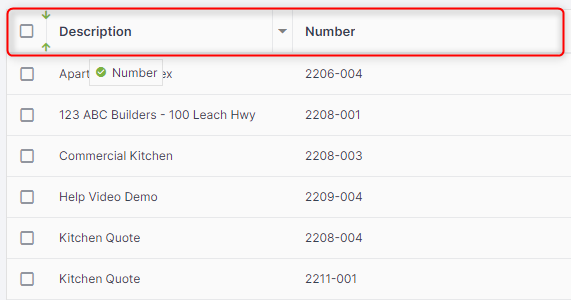
To reposition any of the columns in your display, simply drag-and-drop them as desired.
Example: to move the Number column to the left of the Description column, click on the Number column heading and drag.
The small box with the green tick indicates that you have selected the Number column.
The green arrows to the left of the Description column header indicate where the Number column will be placed once you release your cursor.
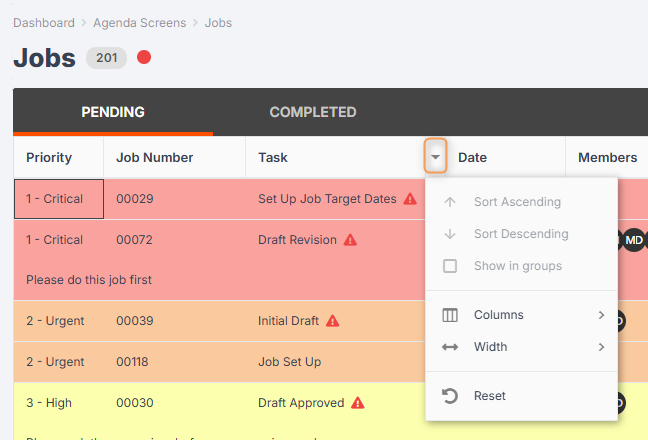
Priority Levels: Your Order of Operations
Agenda screens are arranged so that you should complete the task at the top of the list first.
The tasks on your agenda screen will generally be sorted by target date, meaning that the tasks which need to be completed first will be at the top.
However, your manager might assign priority levels to certain jobs, which means that the tasks for those jobs will be moved nearer to the top of your agenda screen.
Example:
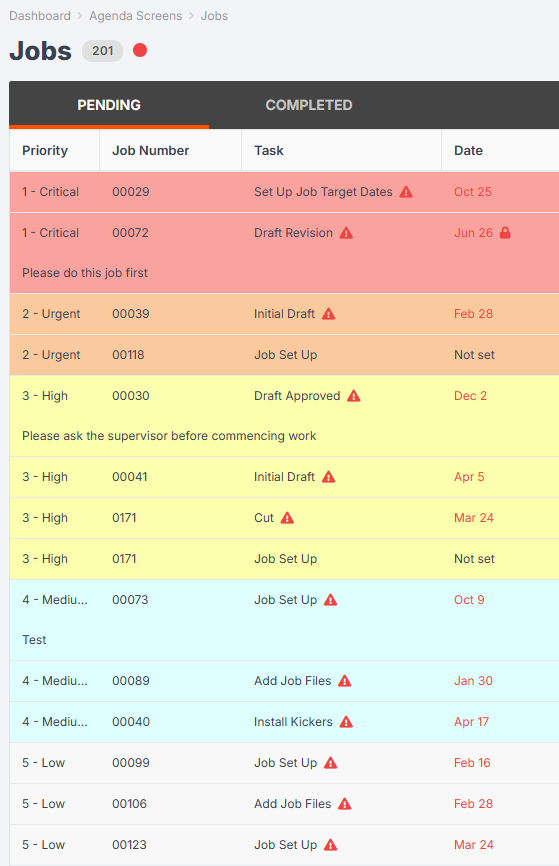
The tasks at the top have been marked 1 – Critical and are coloured red. These are the most important tasks to complete.
The tasks at the bottom have been marked 5 – Low and are coloured grey. Only complete these tasks after you have completed all the others.
Members
Sometimes the tasks in an agenda screen will be assigned to different people – meaning that you will not need to complete all agenda screen tasks by yourself.
Members are used to show which tasks have been assigned to which people.
The members column in your agenda screen will show a person’s initials next to a task if that person has been assigned to complete that task. This will help you quickly determine whether it is your responsibility to complete the task, or another person’s in the team.
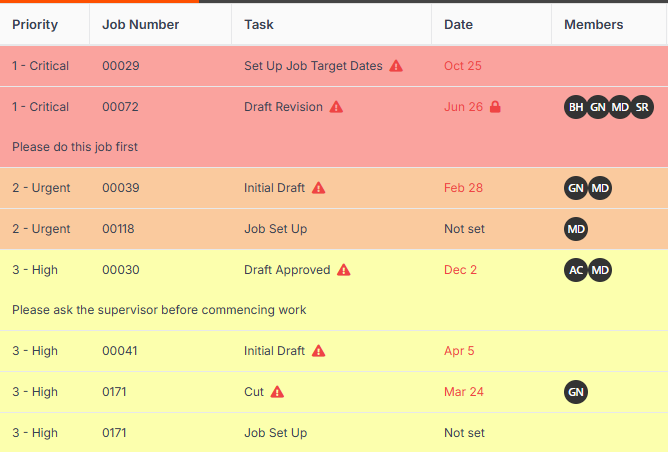
If the task has no members assigned to it (e.g. the members column is blank for this task), then the task can be completed by anyone.
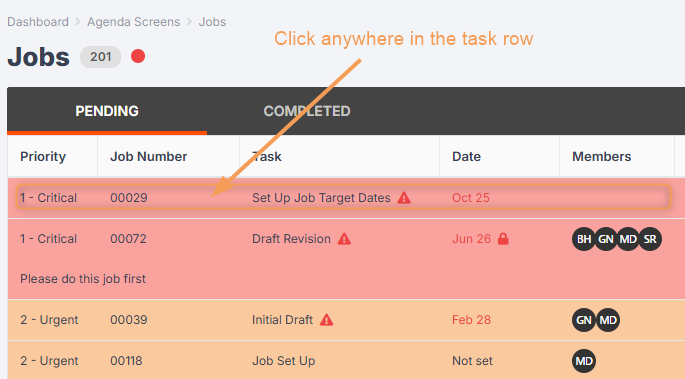
Logging on to Your Tasks
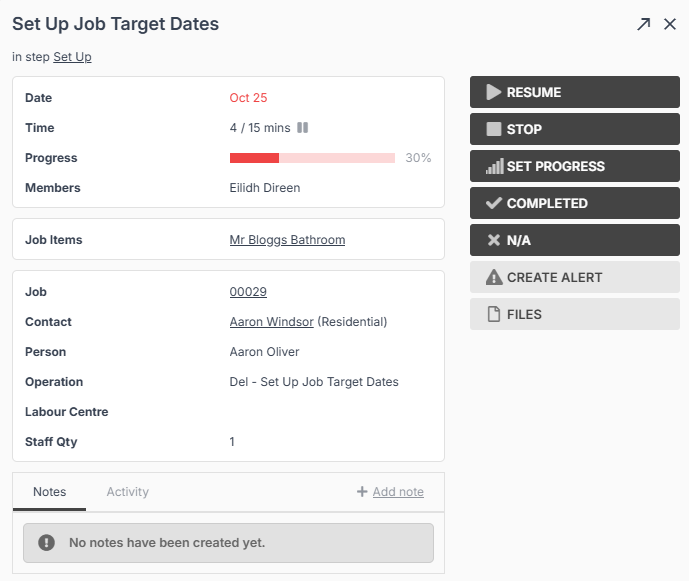
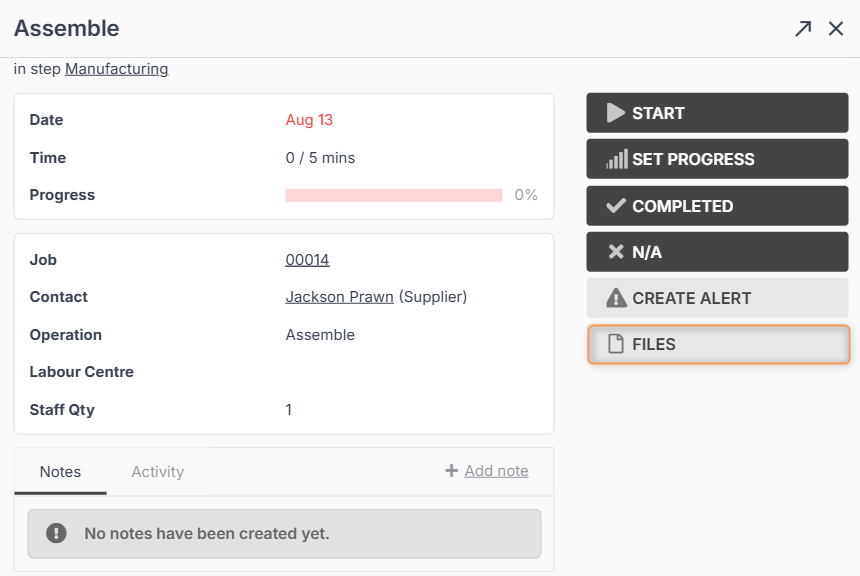
Once you are ready to start your task, click on it inside the agenda screen:
A new window will pop up that looks like this:
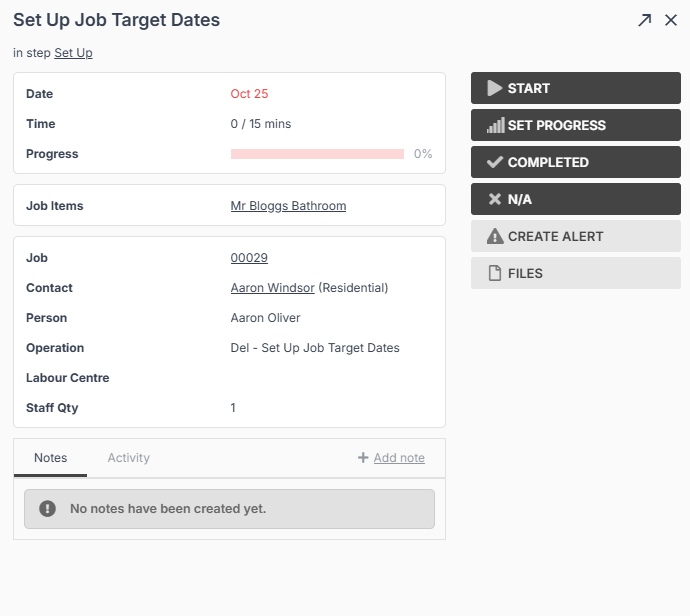
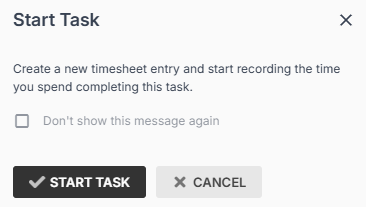
- Press Start to begin logging time against the task.
A pop-up will appear asking you to confirm. Press Start Task:
Once you have started the task, you will see a sand timer icon next to the task time, indicating that you are currently logging time against this task:
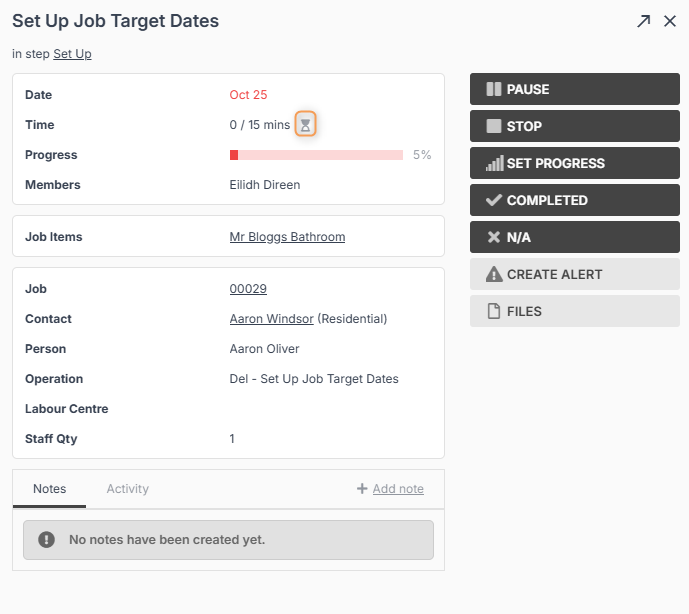
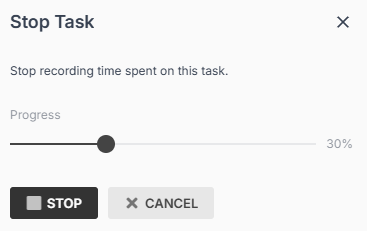
- Press Pause if you need to take a temporary break from the task (e.g. for lunch time or to begin a different task).
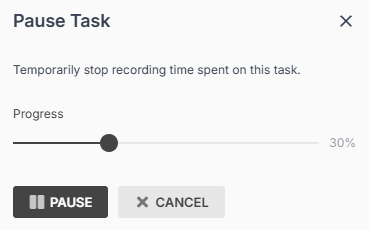
A pop-up will indicate how much progress you have made against the estimated task time. You can click and drag to adjust the progress bar to reflect how close the task actually is to being finished.
Press Pause again to confirm.
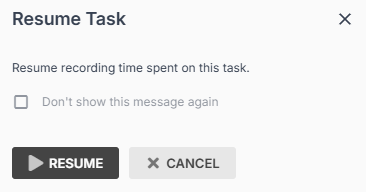
When you are ready to come back to the task, click into it again from your agenda screen and press Resume:
A pop-up will appear and ask you to confirm. Press Resume again:
- Press Stop only if you are finishing work for the day.
A pop-up will appear and ask you to confirm. Press Stop again:
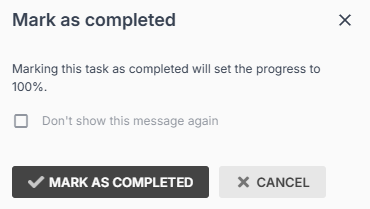
- Press Completed when you have finished the task.
A pop-up will appear and ask you to confirm. Press Mark as Completed:
Once the task has been marked completed, it will be moved from the Pending Tab to the Completed Tab in your agenda screen:

Files
When you click into a task from your agenda screen, you can click on Files to view or upload files related to this task (e.g. drawings, photos, etc.)
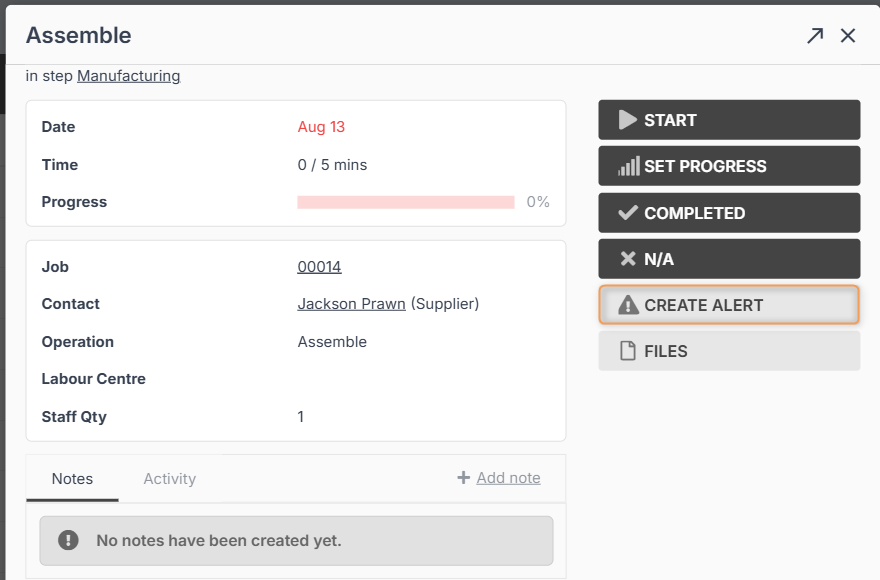
Creating an Alert
If something goes wrong during your task and you need to notify a supervisor (for example, a material is damaged), you can click Create Alert.
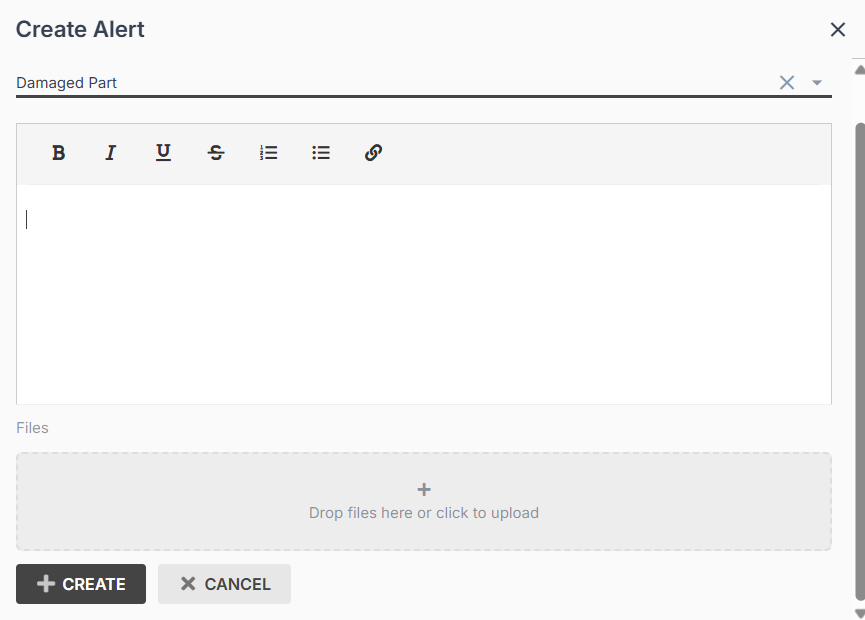
Choose the appropriate Alert Type from the drop-down (please note, these will be different for each organisation):

Then type a message and attach files/photos if needed, and click Create.
Tip: If you click Upload, Jobman will open your camera app so you can easily take and upload photos.
This will send a notification to the relevant staff members.
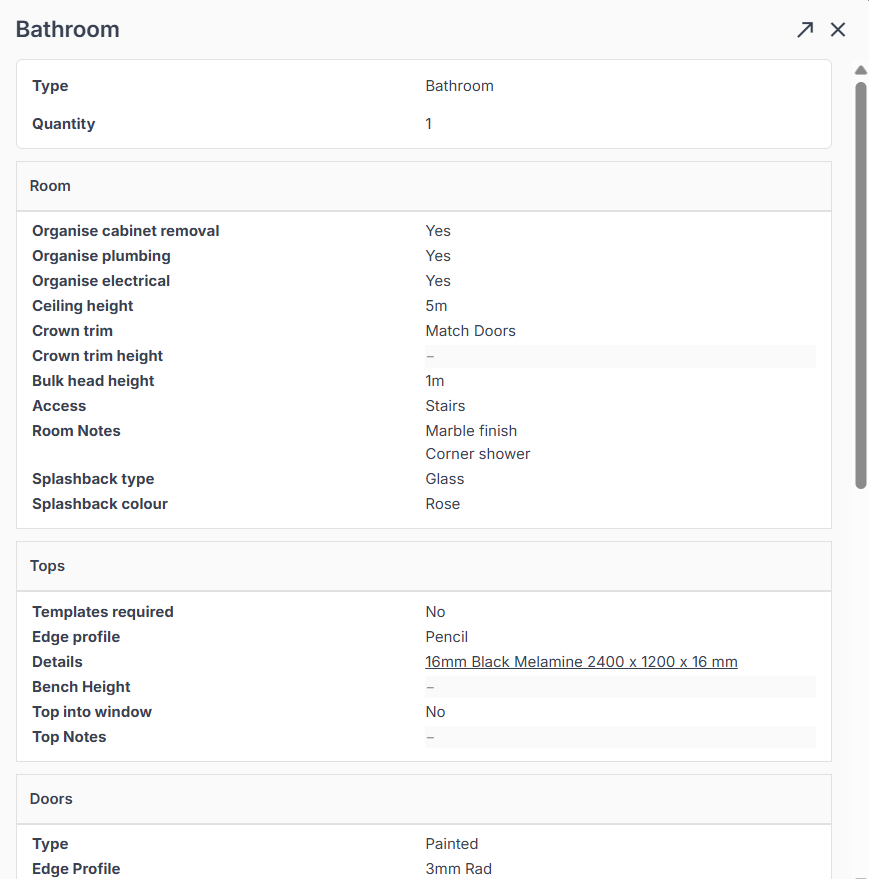
Item Specifications
When you click into a task from your agenda screen, you can click on any of the Job Items to see the item specifications:
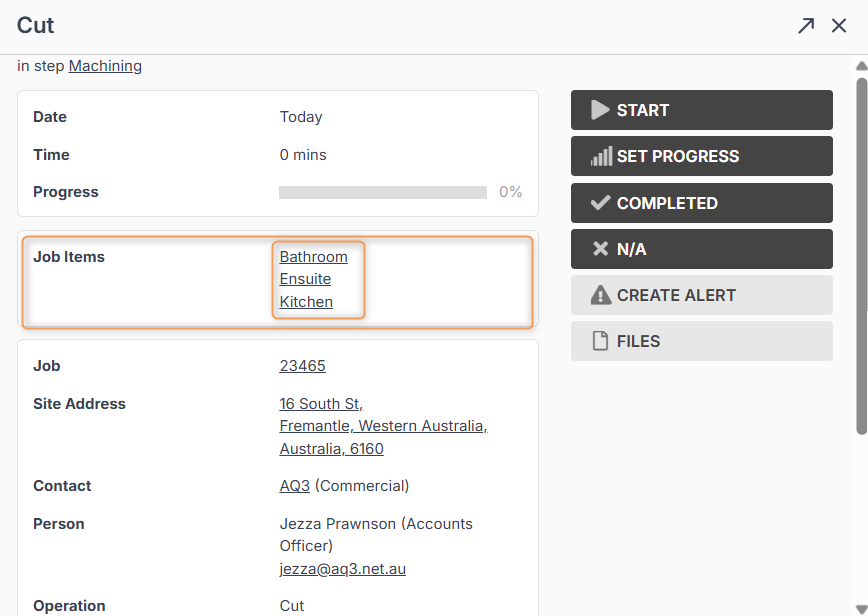
Click on any of the items to open a new window and view specifications:
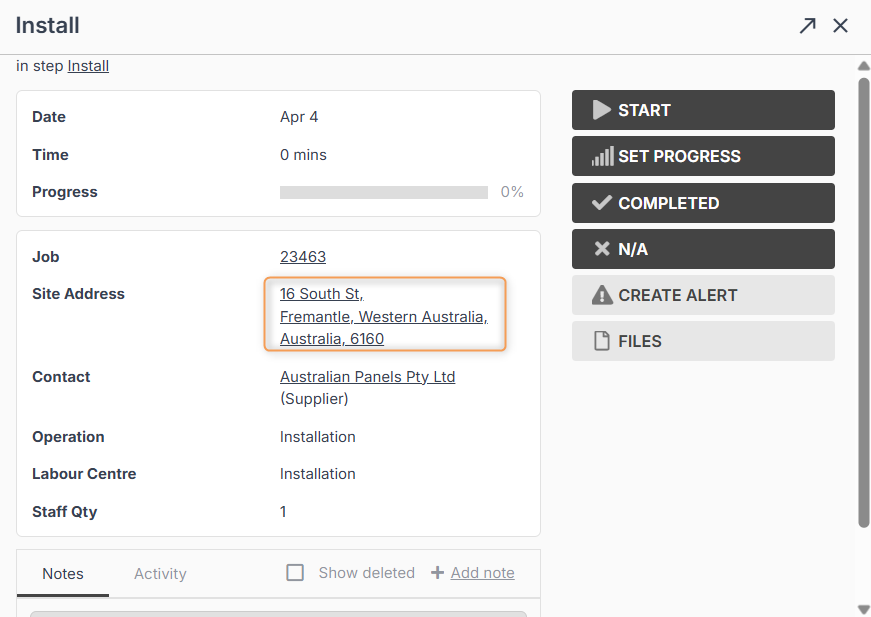
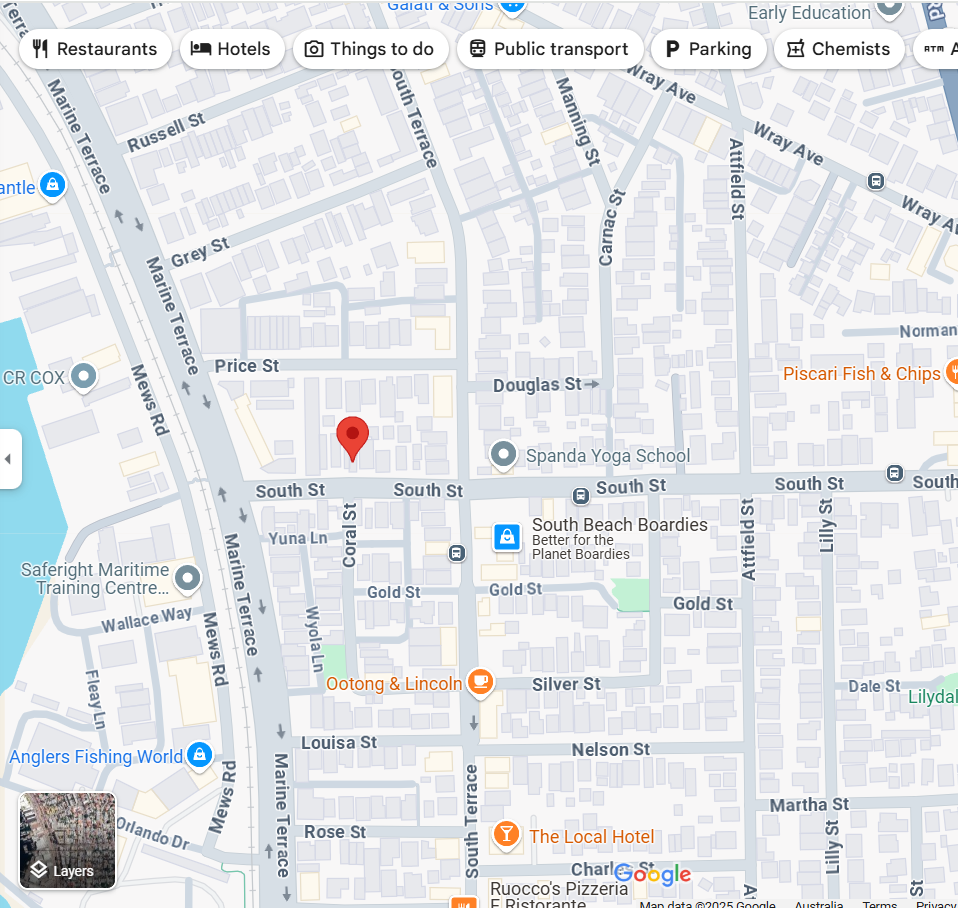
Site Address – Google Maps Link
When you click into a task from your agenda screen, you can click on the Site Address to open a new window which will show the site on Google Maps:
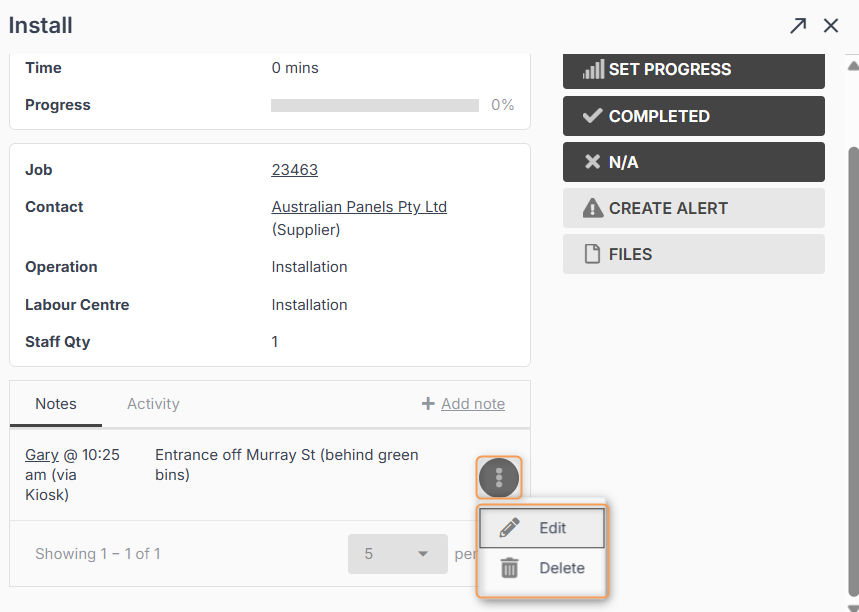
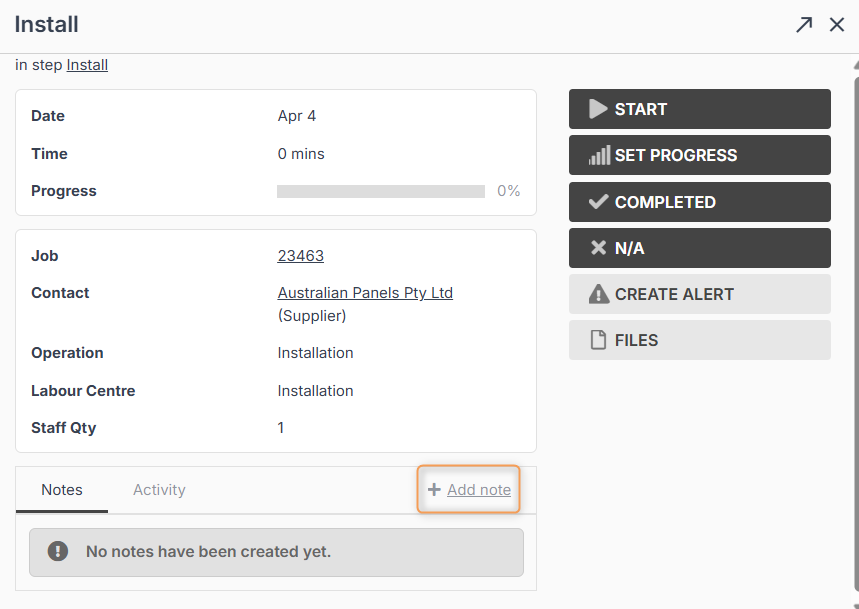
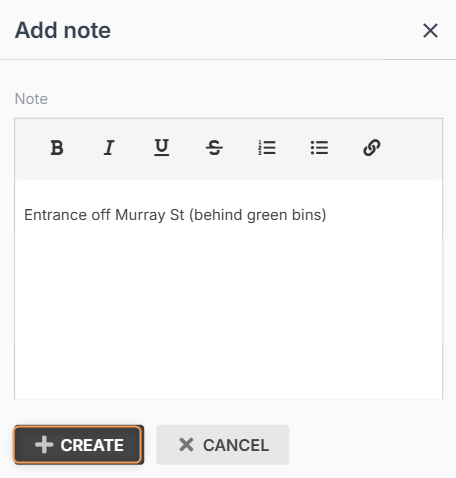
Adding Job Task Notes
When you click into a task from your agenda screen, you can click Add Note to leave a message for the whole team to see:
Type your message as needed and click Create:
Your note will now be visible in the Notes field. If you have the necessary staff permissions, you can click the three-dot menu next to your note to Edit or Delete it.