


Back to: Complete Jobman Set-Up Guide for Administrators
Once you have created a ‘core range’ of products, you can create quote presets to quickly add selections of products to your quotes. A preset is like a checklist of potential products you can add, and when you add a preset to a quote, you can select which products you want to add from the preset to that specific quote.
Example: You might have a preset called “Kitchen” which contains an exhaustive list of all your kitchen-type cabinets and other products. Then each time you create a quote for a kitchen, you can add the “kitchen” preset and select which specific combination of cabinets and other products your client wants.
Creating a Preset
To create a new preset, follow these steps:
- Click Create.
- Name your preset.
- Click Create again.

You will be redirected to the Edit Preset page which will look similar to creating a quote.
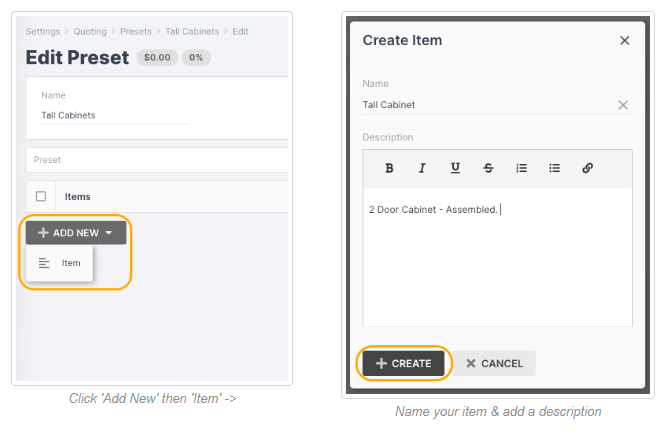
First, add any items:
- Click Add New > Item.
- Name your item, e.g. Tall Cabinets.
- (Optional) Enter a description, e.g. inclusions and exclusions.
- Click Create.
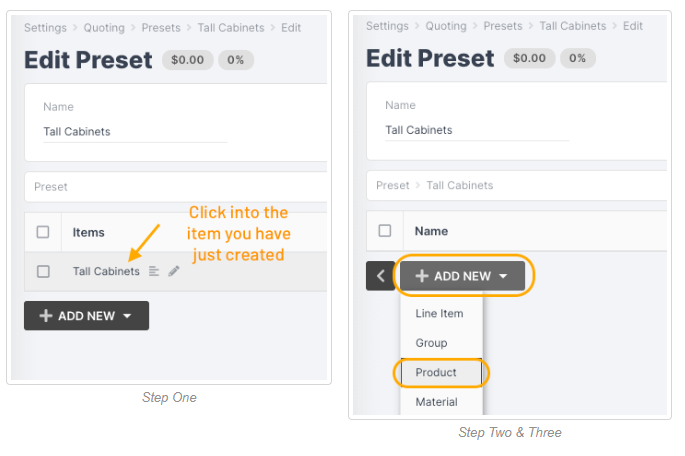
Next, add products:
- Click into the section or item you want to add products to.
- Click Add New > Product.
- Choose a product from your drop-down.
- Change the name if required.
- Select the quantity required.
- Click Create.
Repeat as many times as needed until you have all your products.
Finally, click Save Changes.
Adding Presets to a Quote
Once you’ve set up your presets, you can add these to a quote by following these steps:
- From the User Menu Panel, navigate to Quotes.
- Create a Quote or open an existing quote and click Update.
- Click either the lightning bolt icon or Add New > Preset.
- Choose your preset/s from the drop-down.
- Choose a section to add the preset/s to.
- Click Create.
