


Back to: Complete Jobman Set-Up Guide for Administrators
After creating and sending a purchase order, you can edit, receive, and invoice it using the guidelines in this document.
Understanding Your Purchase Orders Tab
Your Purchase Orders tab gives you an overview of all your purchase orders created to date.
- From this tab you can also create a new purchase order or view any pending purchase orders.
- Customise your display by clicking the arrow next to any of your column headers, and select/de-select the columns you want to see. Drag-and-drop your enabled columns into any order you choose.
- Use the search bar or filters on the left to find any purchase order you want.
- Click into a purchase order to edit it or send. If you see the pencil icon next to a purchase order, this means it is currently being edited.

Editing a Purchase Order
To edit a purchase order, follow these steps:
- From the User Menu Panel, navigate to Purchase Orders.
- Click into the purchase order you want to edit.
- Click Update or Continue Editing. From here you can edit or add the date created, delivery date, reference, supplier, location, items, etc. Simply click into the field you want to update, and make your changes.
- To add new items to the purchase order, click Add New.
- Choose either Material, Service, or Pending Items from the drop-down.
- You’ll be redirected to Create Material or Create Service, where you can select or create the items you want to add. Or you will be redirected to Pending Items, where you can select any items waiting to be ordered from the relevant supplier.
- If you need to delete a line, select it using the checkbox at the left of the Edit Purchase Order screen, then click With Selected > Delete:

- Once you’ve finished editing, click Save Changes.
You’ll be redirected to your purchase order summary. If required, send your revised purchase order.
Automation: If you’ve allocated a job to your purchase order, the PO will appear in that job under Resources > Purchase Orders.
If you send your purchase order via email, its status will automatically update to Sent. However, if you have printed to PDF or exported to CSV, you will need to update your PO status manually (more on this later in the lesson).

Receiving a Purchase Order
To fully or partially receive a purchase order, follow these steps:
- From the User Menu Panel, navigate to Purchase Orders.
- Click into the purchase order you want to receive.
-
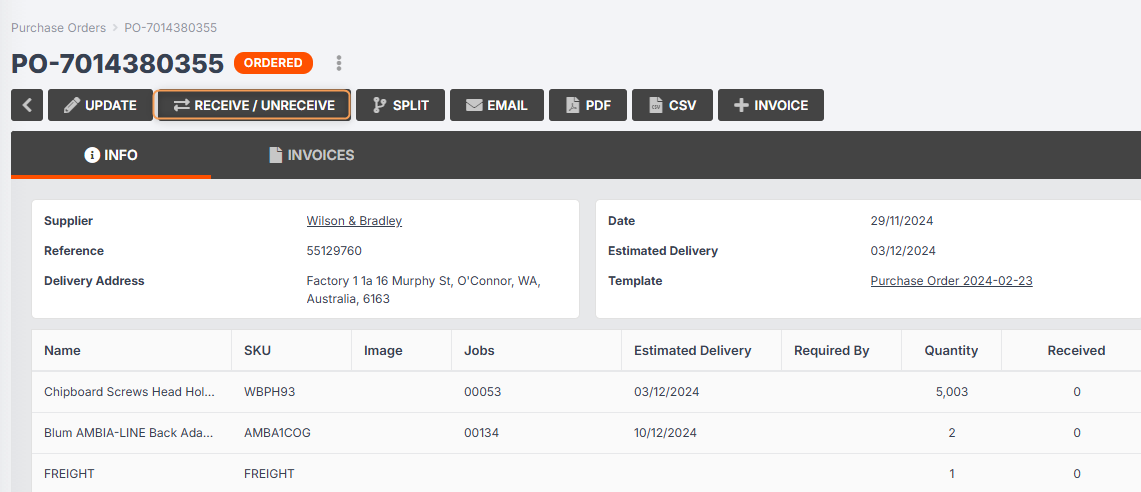
Click Receive / Unreceive. If you cannot see the Receive / Unreceive button, you need to make sure that the purchase order is in a status that can be received.
-
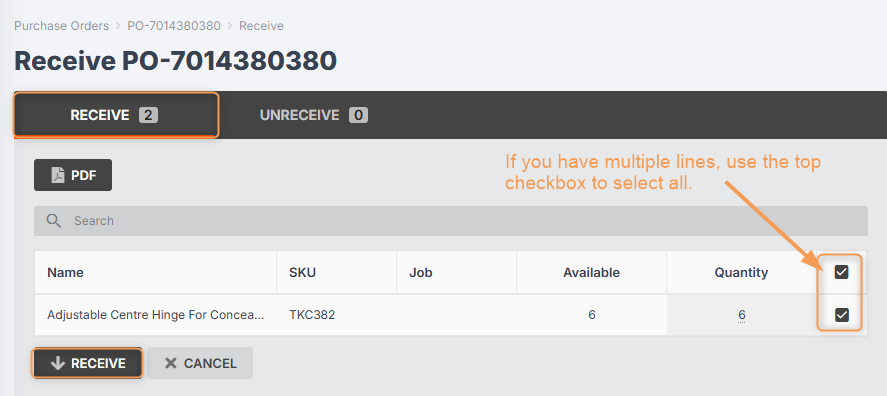
To fully receive the purchase order: Make sure you are in the Receive tab. Check that the quantity of items received matches the quantity of items ordered, then click Receive.
-
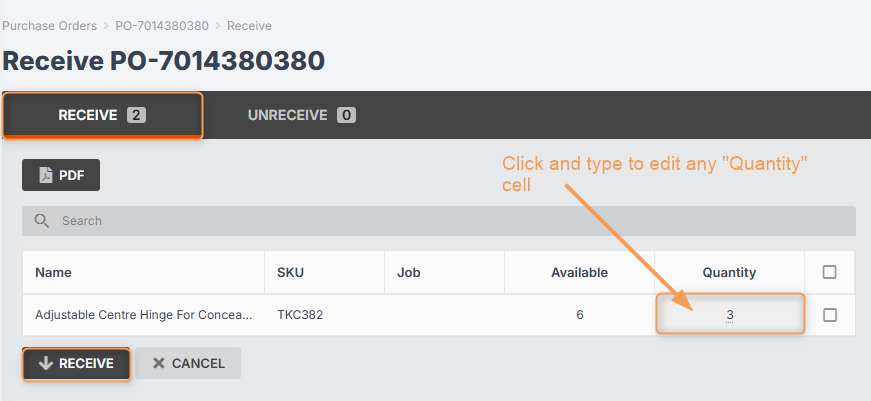
To partially receive the purchase order: Make sure you are in the Receive tab. Click into the Quantity column to edit the quantity of items received, then click Receive.
Automation: After you click Receive, your purchase order status will automatically update to either Partially Received or Fully Received.
Please Note: You cannot receive a purchase order just by changing the purchase order status to Partially/Fully Received.
Splitting a Purchase Order
Splitting purchase orders can be useful if certain items are going to be received across different months, or if you have a large purchase order that you want to split across multiple jobs.
To split a purchase order, follow these steps:
- From the User Menu Panel, navigate to Purchase Orders.
- Click into the purchase order you want to split.
- Click Split.
- Double click into the Quantity column to edit the quantity of items you want to allocate to the new partial PO. (The remainder will stay allocated to the originating PO.)
- Click Split again.
You’ll be redirected to the new partial purchase order, which will automatically be assigned a new PO number. The new PO number will be the same as that of the originating PO, followed by a second number which corresponds to the number of times you have split the PO.
Example: If you split PO-0001, you will have PO-0001 and PO-0001.1.


Unreceiving a Purchase Order
If your PO is in the status Fully Received or Partially Received, and some or all of the PO items have been marked “received” by mistake, you can easily undo this by clicking into the PO and following these steps:
-
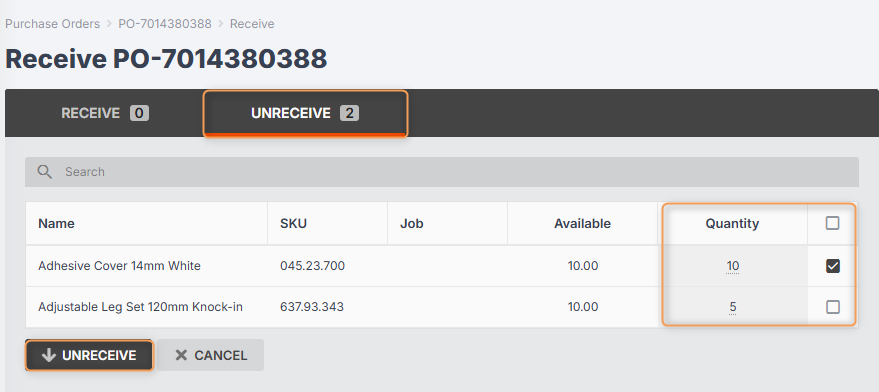
Click Receive / Unreceive.

-
Make sure you are in the Unreceive tab. Use the checkboxes or type in the Quantity cells to enter the materials you want to unreceive, then click Unreceive:
Invoicing from a Purchase Order
After receiving your goods, you can create an invoice from inside the purchase order by following these steps:
- From the User Menu Panel, navigate to Purchase Orders.
- Click into the purchase order you want to invoice.
- Click Invoice.
- A pop-up will appear and ask you to confirm. Click Create.
- You’ll be redirected to your new invoice, which will be in Draft status.
- Click Submit.
- A pop-up will appear and ask you to confirm. Click Submit again. This will sync the invoice with your accounting software.
- Depending on which permissions have been enabled for your role, you can then approve the invoice for payment by clicking Approve. A pop-up will appear and ask you to confirm. Click Approve, and the invoice status will change to Awaiting Payment.
Manually Updating a Purchase Order Status
If you have printed your purchase order to PDF or exported to CSV, rather than emailing it, you will need to manually update the purchase order status to Sent. You can do this just by clicking on the status at the top of the PO, and selecting a new status from the drop-down.
