Skip to content
Jobman AcademyJobman Academy
  • Academy
  • My Account
Jobman AcademyJobman Academy
  • Academy
  • My Account

Contact Emails and Resources

Home » Contact Emails and Resources
Breadcrumb Abstract Shape

Contact Emails and Resources

  • February 20, 2025
  • Com 0

Back to: Complete Jobman Set-Up Guide for Administrators

0

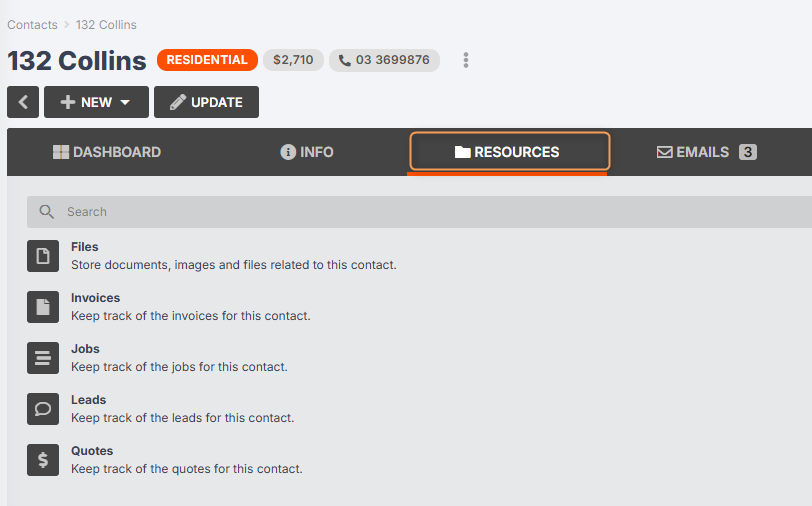
To view files, invoices, jobs, leads, and quotes associated with a contact, go to Contacts from the User Menu Panel, click into the contact you wish to view, then click on the Resources tab:

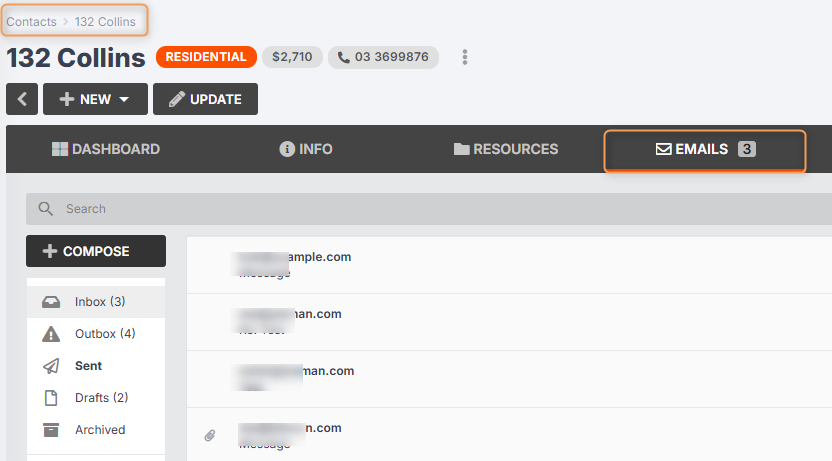
To view emails sent and received from a contact via Jobman, click into the contact as above, then click on the Emails tab:

About Jobman’s Email Client

Jobman software offers a built-in email client, so that you can send emails and attachments and respond to your customers directly from your Jobman app!

All staff with the appropriate roles and permissions can view and send emails in Contacts, Leads, and Jobs. This means that relevant information is centralised and accessible to anyone who needs it, rather than being confined to an email chain in one user’s account.

Attach files to emails directly from your organisation’s cloud file storage, or upload as required.

Email Templates

Set up your standard email reply and standard correspondence templates by navigating to Settings > Templates.

Click Create to add a new template, or click into an existing template to edit it.

Did you know? Your Jobman software automatically includes ready-to-use email templates!

Sending Emails to a Specific Contact or Person

  • When you are composing an email in Jobman for a specific contact person/member, Jobman will attempt to fill the name in for you. However, in some cases the name can’t be determined, which means this field will be blank in the final email.
  • In our default templates, we add this variable using this syntax: “{{ name | default: contact.name }}”, which inserts the contact name if the person’s name cannot be determined.
  • The “name” variable will not be populated until you have selected a recipient for the email.
  • Please note that the name only gets filled in if you have not made any changes to the email content or if the email has been saved as a draft. If, for example, you select “John” as the recipient, then write the email, then change the recipient to “Jane”, the name will not change from John to Jane.

How Do I Get Incoming Emails to Send to Jobman?

Provide a link to your customers that will deliver emails to your Jobman software under Contacts > [Contact Name] > Emails, as shown below:


Previous Lesson
Contact Types, Roles, and Sources
Lesson 3 within section CRM Management.
Next Lesson
What is a Lead?
Lesson 1 within section Lead Management.

Course Syllabus

  • General Navigation and Usability
    • General Navigation
    • User Control and User Settings
    • User Licenses and Staff Types
    • Staff Roles and Permissions
  • Getting Started
    • Connect to Your Cloud File Storage
    • Connect to Your Accounting Software
    • Setting Up Your Staff
    • Setting Up and Managing Staff Login Details
  • CRM Management
    • How to Add Contacts
    • How to Manage Contacts
    • Contact Types, Roles, and Sources
    • Contact Emails and Resources
  • Lead Management
    • What is a Lead?
    • How to Create a Lead Workflow
    • How to Create a Sales Labour Centre
    • How to Create an Agenda Screen for Your Sales Team
    • Lead Settings: Types and Statuses
    • Lead Settings: Details
    • Lead Settings: Members and Member Types
    • Create Lead Item Types and Specifications
    • Automated Triggers in Lead Workflows
    • How to Create a Lead
    • How to Manage and Edit a Lead
  • Job Management
    • How to Create a Job Workflow
    • Automated Triggers in Job Workflows 
    • Job Settings: Types, Statuses, Details, and Members
    • How to Create Labour Centres for Your Jobs
    • How to Create Agenda Screens for Your Jobs and Staff
    • Understanding Your Capacity
    • How to Create a Job
    • How to Manage and Edit a Job
    • How to Create a Work Order from a Job
    • How to Use Your Target Calendar
  • Kiosk
    • How to Set Up Kiosk Staff Working Hours
    • Overview of Kiosk Mode Functions
    • How to Create Agenda Screens for Your Kiosk Staff
    • Staff Member Types and Automated Task Allocation
    • How to Create Activity Screens for Your Staff
  • Quoting
    • The Four Levels of a Jobman Quote
    • How to Build Products
    • How to Create Styles and Range Options
    • How to Build Quote Presets
    • Quote Templates
    • Quote Statuses
    • How to Create and Send a Quote
    • How to Refresh Quote Pricing
    • How to Copy and Revise Quotes
    • How to Create, Send, and Sync Invoices
  • Catalogue Management and Inventory
    • Catalogue Settings
    • Setting Prices and Measurements for Catalogue Materials
    • How to Create and Import Catalogue Materials
    • How to Create Catalogue Services
    • How to Add and Manage Inventory Items (Stock)
    • Price Matrices
  • Purchase Ordering and Inventory Picking
    • How to Create Purchase Order Statuses
    • Managing Job Resource Materials
    • How to Create and Send Purchase Orders
    • How to Manage, Edit, and Receive Purchase Orders
    • Picking List and Inventory
    • How to Set Up Minimum Stock Quantities for Purchase Ordering
    • Supplier Integration – Hafele
    • Supplier Integration – Wilson & Bradley
  • Reporting
    • Reports in Jobman
    • Quote Summary Report
  • Job Alerts and Forms
    • How to Create and Use Job Alerts
    • How to Create and Use Job Forms
  • Payroll Set-Up and Time & Attendance
    • How to Set Up Staff Pay Rates
    • How to Log Staff Time and Attendance
    • How to Log Staff Leave, Public Holidays, and Temporary Business Shutdowns
  • CAD/CAM Integration
    • How to Connect Your CAD/CAM Software
    • Cabinet Vision
    • Mozaik
    • Microvellum
    • Winner Flex
Copyright 2025 Jobman Pty Ltd. All rights reserved.
Jobman AcademyJobman Academy
Sign inSign up

Sign in

Don’t have an account? Sign up
Lost your password?

Sign up

Already have an account? Sign in