


Back to: Complete Jobman Set-Up Guide for Administrators
Members are added to a lead to allocate certain staff to be responsible for that lead and complete all the tasks in its workflow.
Members will receive notifications and correspondence related to the lead, and can be automatically assigned to specific tasks in the workflow depending on their member type.
Member types are used in leads to link individual staff to specific tasks, operations, notifications, etc.
For example, you might have a lead member type called “Salesperson”, which is automatically assigned to the tasks, “Contact,” “Follow-Up Email,” and “Discovery Call”.
Creating a New Lead Member Type
To create a new lead member type, follow these steps:
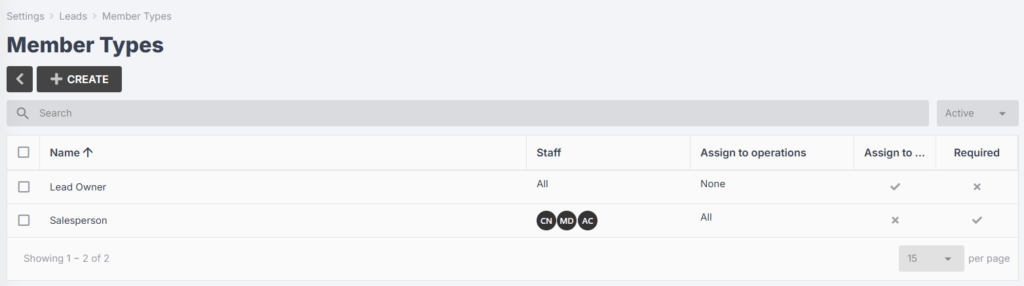
- Go to Settings > Leads > Member Types:
- Click Create, and you will be redirected to a new screen:
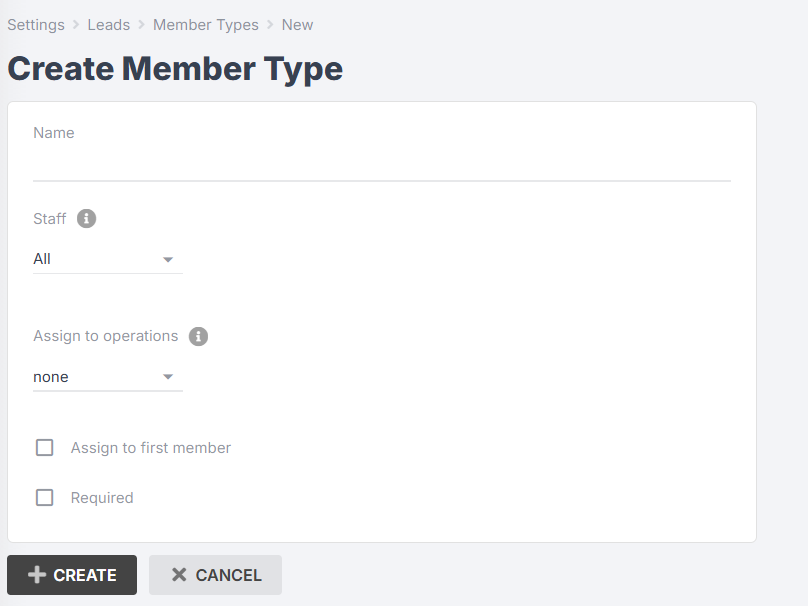
- Name your member type, e.g. “Salesperson”.
- Choose whether this member type can be applied to All or Selected staff. If you choose Selected, a second drop-down will appear for you to choose one or more staff who can be given this member type.
- Under Assign to operations, choose All, Selected, or None. If you choose Selected, a second drop-down will appear for you to choose one or more operations to assign this member type to.
When you add one of your staff as this member type to a new lead:
– If you chose all operations, your staff member will be automatically assigned to all tasks in the workflow for that lead;
– If you chose selected operations, your staff member will be automatically assigned to the corresponding tasks in the workflow for that lead;
– If you chose none, your staff member will not be automatically assigned to any tasks in the workflow for that lead. - Tick the box for Assign to first member if you would like the first person added as a member to a lead to be automatically given this member type. Leave the box unticked if you would rather assign a member type manually when first adding a member to a lead.
Example: You may create a member type for “Salesperson” and select Assign to first member if they are likely to be the one creating the lead. You would leave this box unticked for a “Receptionist” member type if your receptionist is the one entering leads on behalf of your sales team. - Tick the box for Required if you would like to prevent leads from being created without assigning at least one member of this type.
- Click Create again.
Please Note: You cannot have more than one lead member type with “Assign to first member” enabled.
Updating or Deleting a Lead Member Type
When in Settings > Leads > Member Types, you can:
- View the Staff column to see whether a member type can be allocated to all or selected staff.
- View the Assign to operations column to see which operations (if any) a member type has been assigned to.
- View the Assign to first member and Required columns to see if these options have been selected.
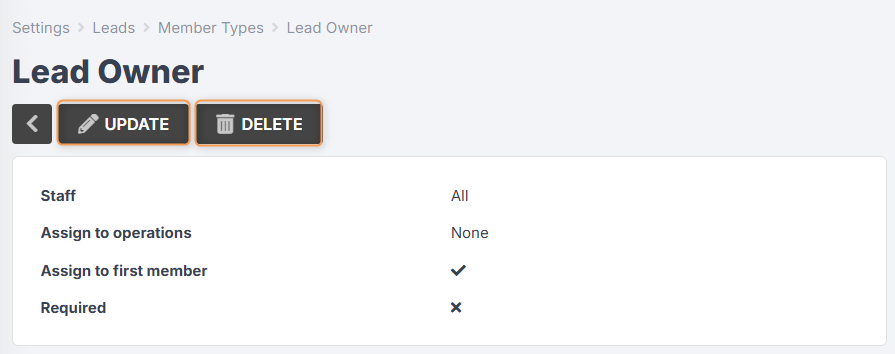
You can then click into any existing member type to view a summary of its settings.
- To edit the member type, click Update, enter any changes needed, then Save Changes.
- Click Delete to remove this member type from your settings.
Assigning Members to a Lead
When creating a new lead, if you have marked certain member types as Required, those member types will show up in the Create Lead page:


Tips:
- You can assign more than one member type to the same person.
- You can also add multiple people with the same member type.
You can also add members to a lead after you have created it, using these steps:
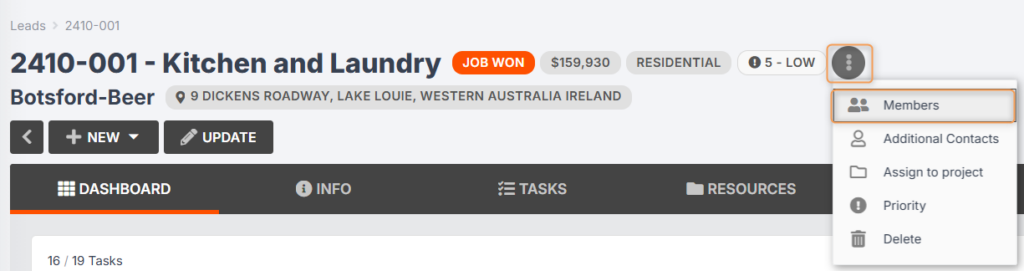
- Click into your lead.
- Click the 3-dot menu at the top-left, then click Members:
A pop-up will appear listing any current members. You can click the 3-dot menu next to an existing member to Edit or Delete them.

- Click Add Member.
- A second pop-up will appear. Under Staff, either type a name or select from the drop-down:

- Use the Type drop-down to select one or more member types to assign to this staff person.
Note: You will only be able to select from member types that can be assigned to this staff person. - Click Add Member again.
Assigning Members to Tasks
Once you have added members to your lead, if you go to the Tasks tab, your members will be assigned to specific tasks, provided you have linked your member types to all or selected operations.
You can also add members to a task manually, using these steps:
- Click on the task in the Tasks tab.
- Click Members:
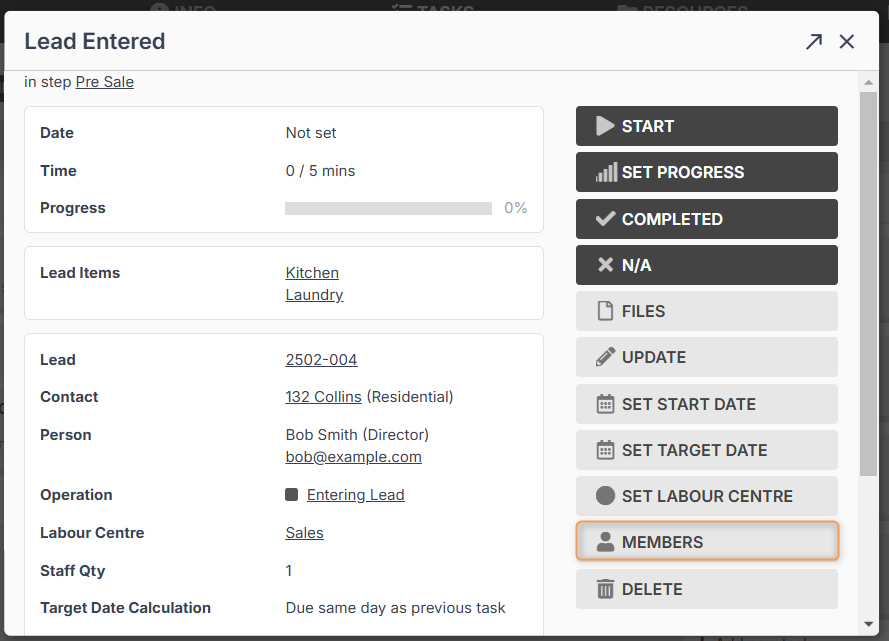
3. Start typing a name or use the drop-down to select a staff person:
Note: You cannot assign a member type when adding members this way.
The member for this task will also not appear in the Members list in the lead.
The staff person will receive a notification that they have been added to a task, and their initials will appear on that task in the target calendar.
Filtering for Members and Member Types
- When in the Leads tab, you can view columns for each member type, so you can see who is assigned as that member type:

- When filtering by members in the Leads tab, or in Reports, if you filter by member type first, the list of staff you can filter by will be limited to those assigned to that member type.