


Back to: Complete Jobman Set-Up Guide for Administrators
Triggers can be created and assigned to tasks in your workflows. When the task is completed, relevant staff and contacts will receive either an email or an internal notification with a set message or instructions.
Creating Triggers
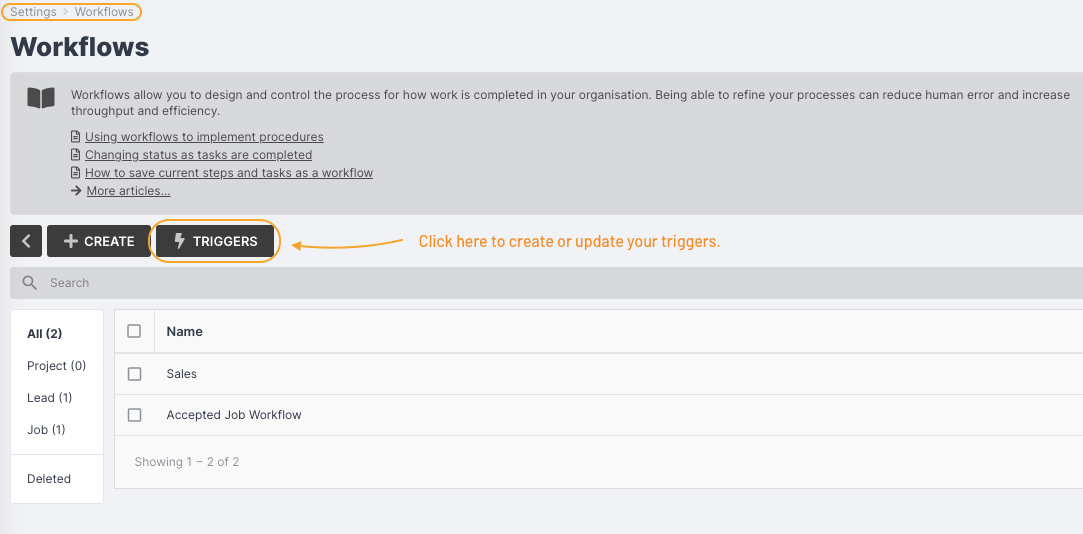
- Go to Settings > Workflows > Triggers.
Creating an Email Trigger
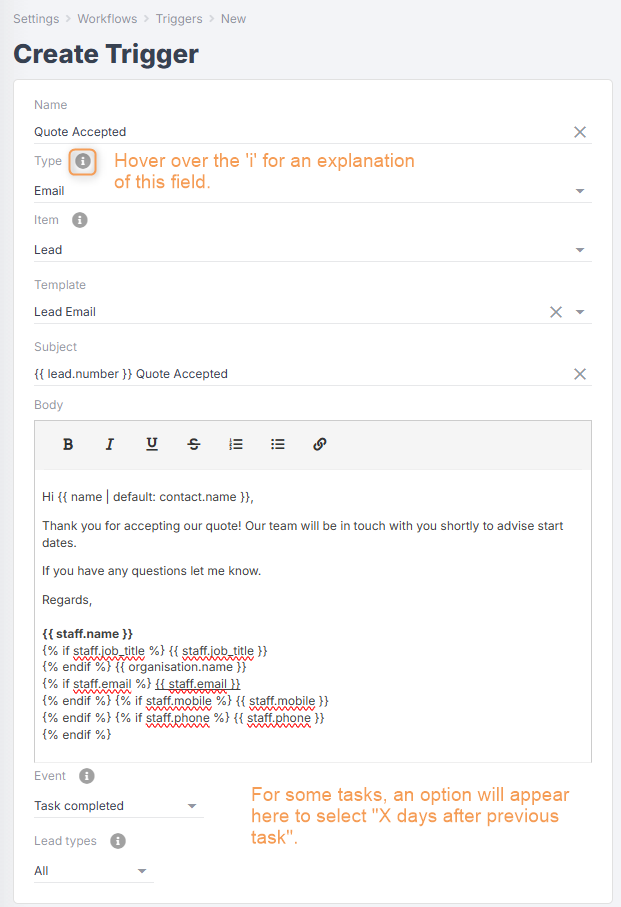
- Click Create.
- Name your trigger (e.g “Quote Accepted”).
- From the Type drop-down, select Email.
- From the Item drop-down, select Lead.
- Choose the email template you want to apply to this trigger. Note: different templates will include different template variables – see section below. For example, the Lead Email template includes variables such as lead number and lead ID, whereas the Email template does not.
- From the Event drop-down, select when you want this trigger to be activated (e.g. “Task completed”).
- Depending on the event chosen, a new option will appear to add days before/after the event (e.g. “2 days after”).
- Select the lead type(s) you want this trigger to apply to.
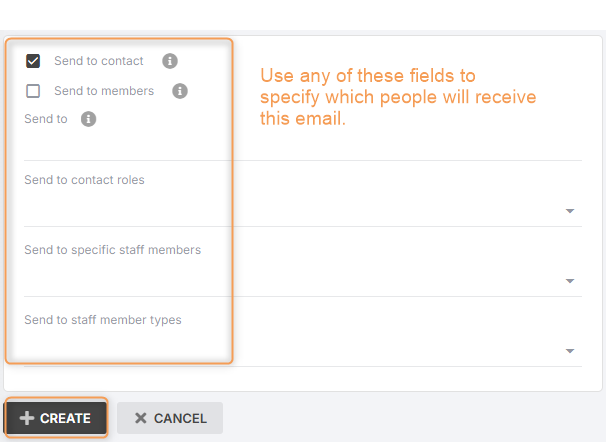
- Set the parameters for who is to receive the email (see below)
- Click Create.
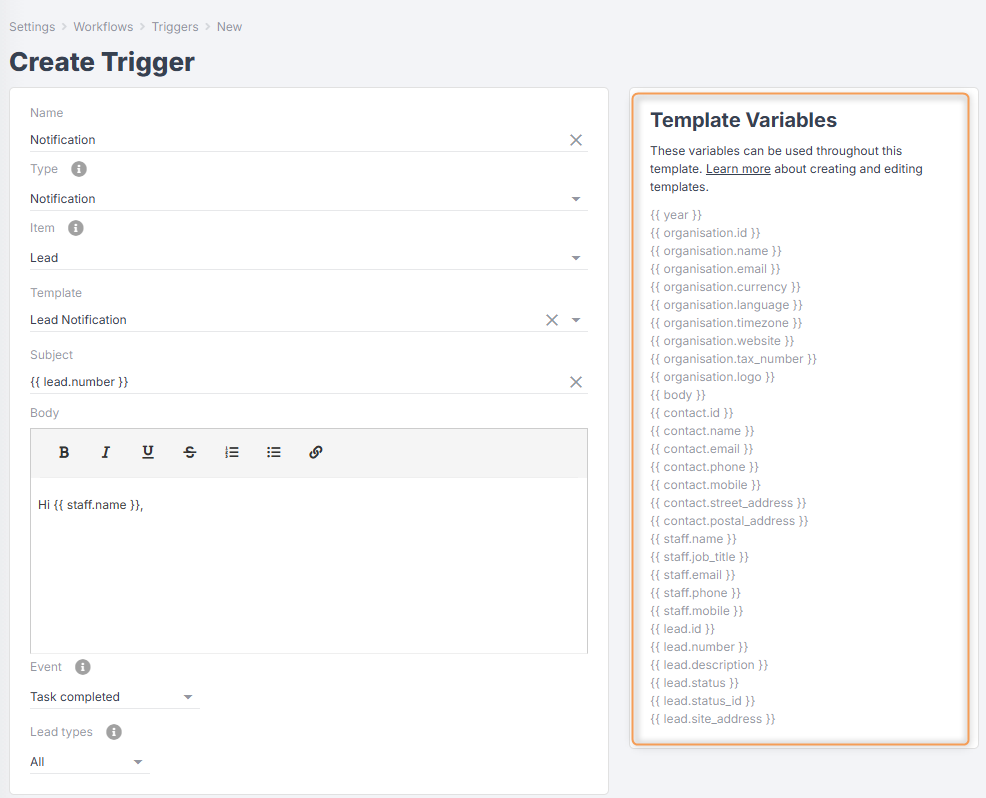
Creating a Notification Trigger
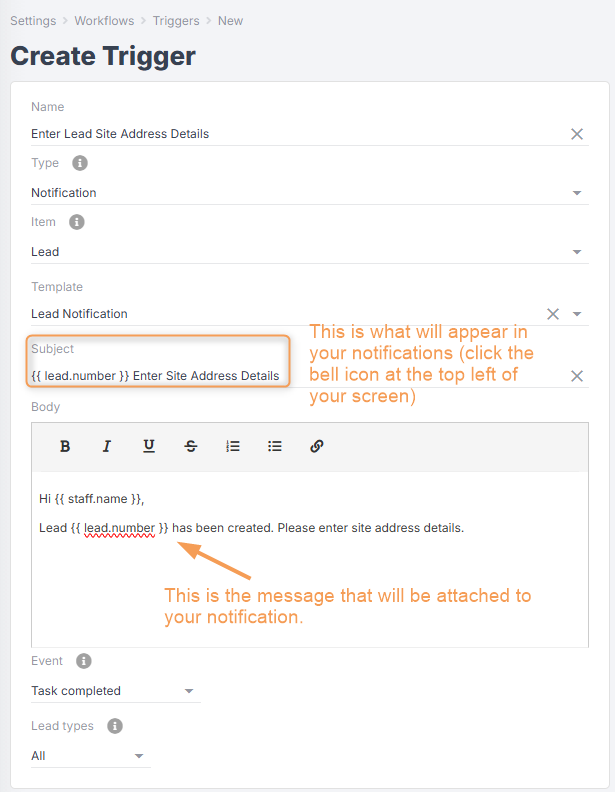
- Click Create.
- Name your trigger (e.g “Enter Lead Site Address Details”).
- From the Type drop-down, select Notification.
- From the Item dropdown, select Lead.
- Enter a subject line for your notification.
- Enter the body text for your notification.
- From the Event drop-down, select when you want this trigger to be activated (e.g. “Task completed”).
- Depending on the event chosen, a new option will appear to add days before/after the event (e.g. “2 days after”).
- Set the parameters for who is to receive the email (see below).
- Click Create.
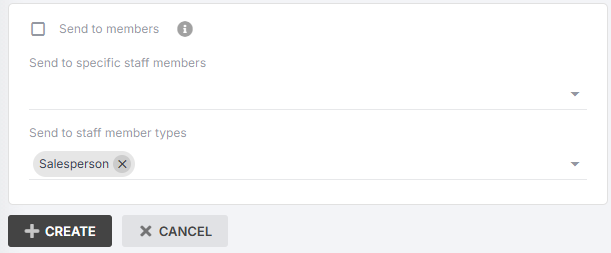
Please Note: When assigning triggers to Staff Member Types, staff must be added to a lead as this member type to be able to receive the notification.
Example: You have multiple salespeople within your company, so you assign the appropriate saleperson to each lead, ensuring they only receive notifications for their own leads.
Assigning Triggers
Once you’ve created your triggers, you can assign them to tasks in your workflows.
- Go to Settings > Workflows
- Click into the workflow that contains the task you want to assign a trigger to.
- Click into the relevant task and click Update.
- From the Triggers drop-down, select the relevant trigger.
- Click Save Changes.
 Step 3: scroll down to the ‘Triggers’ field & choose the relevant trigger from the dropdown. Step 3: scroll down to the ‘Triggers’ field & choose the relevant trigger from the dropdown. |
 |
Please note: You can switch off your triggers at any time. Go to Settings > Workflows > Triggers, then click into the trigger you want and click Update.
Deselect the Enabled checkbox. This will automatically disable this trigger inside all jobs or leads until you enable it again.

Hyperlink Template Variables in your Triggers
When creating a trigger, you can add template variables to its body text by copying and pasting from the list on the right. This will prefill your email or notification with relevant information when the trigger is activated.
You can also add a hyperlink to a template variable in your trigger so that when it is received, you can click the link to be taken directly to the relevant job or lead.
Please note: You can only hyperlink template variables containing “ID”.
Example: {{ lead.id }} / {{ lead.status_id }}
To hyperlink a template variable:
- Copy and paste the variable from the list into your template.
- Highlight the variable, and a pop-up should appear.
- Click the chain icon:

- In a new tab, open Jobman and click into Leads.
- Copy the page URL, then return to your other tab.
The page URL will look something like this: https://jobmanapp.com/#organisations/3bc2be-2079-49d0-rf72-2a681b94b326/leads/
- In your template, paste the URL into the URL field.
- Add your template variable (in bold below) to the end of the URL after the “/”.
Your URL should now look something like this:
https://jobmanapp.com/#organisations/3bc2be-2079-49d0-rf72-2a681b94b326/leads/{{ lead.id }}
- Click Save.