


Back to: Complete Jobman Set-Up Guide for Administrators
If you have set the source for one or more job materials to Purchase Order, you will then need to purchase these materials so the job can be completed.
You can create a purchase order using one of two methods: from the Purchase Orders tab, or from the job itself.
Creating a Purchase Order from the Purchase Orders Tab
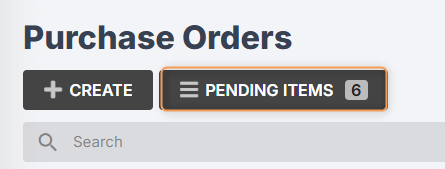
- Go to Purchase Orders.
-
Click Pending Items:
- Select a supplier and location.
-
You can select your job, if you want all materials in this PO to be allocated to that job.
Otherwise, if you want to order materials for multiple jobs and/or stock, leave the job field blank.
- You can Search for a particular material if you need to.
- You can tick Include Low-Stock Materials if you have not selected a job for this PO, and if you want to reorder stock materials that are running low in inventory. (Learn More)
- Select the materials from the list that you want to add to the purchase order, or click Create to select all:
- You will be redirected to your newly created purchase order, where you can edit further, send, invoice, etc. (Learn More)
Note: If you select a job, this will create a job purchase order which will behave differently to a regular purchase order. (More on this below.)
Removing Items From the Pending Items List
If you have materials or services in your Pending Items list that no longer need to be purchase ordered, please note that there is no Delete option, as this can negatively impact other areas of your software.
However, you can do one of two things instead:
-
If you only need to remove the items from Pending, but not the job itself:
Select the items from the Pending list, then click With Selected > Reset Source:

Set the source to None.
This will remove the items from your Pending list, but they will remain visible in Job > Resources > Materials.
-
If you need to remove the items from the job itself:
Go to Job > Resource > Materials.
Select the items, then click With Selected > Delete:
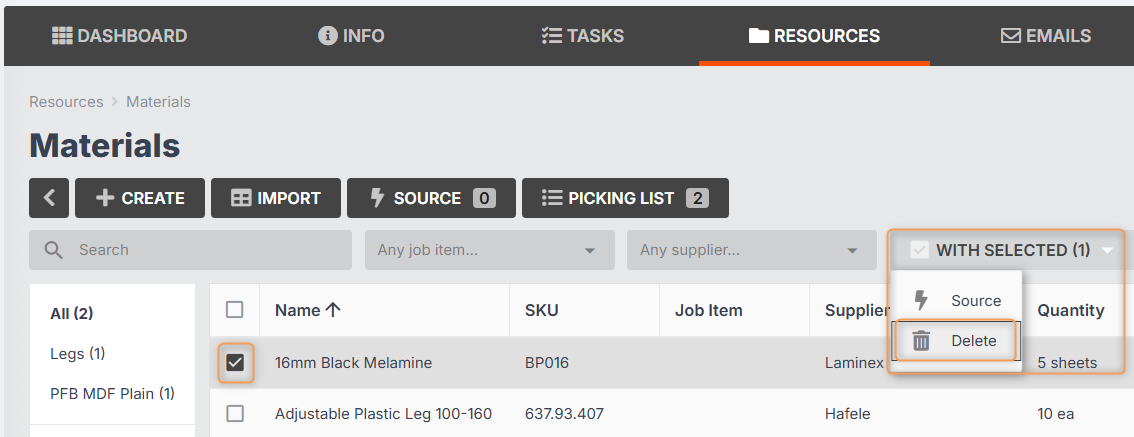
This will also remove the items from Purchase Orders > Pending Items.
Creating a Purchase Order from the Job
- Go to your job.
- At the top-left, click +New > Job Purchase Order:
- Choose a supplier from the drop-down, add a reference (optional), and select a location (most organisations only have one location).
- Tick Include pending items. (You would leave this unticked if you needed to create a placeholder PO, for example, if you haven’t yet chosen a supplier to send to.)
- Click Create.
- You will be redirected to your newly created purchase order, where you can edit further, send, invoice, etc.
Note: By default, this method will create a job purchase order which will behave differently to a regular purchase order. (More on this below.)
Receiving Job Materials From a Purchase Order
Once the ordered materials have arrived, you will need go to your purchase order to receive them.
Any materials ordered for stock will be added to your Inventory, where they can be allocated to other jobs.
Any materials ordered specifically for your job (i.e. materials that have been sourced from your job resources) will be added to your Inventory with the job number attached. These cannot be allocated to other jobs.
Additionally, any assigned job materials will automatically have their pricing updated to reflect the ordered price, and any extra units will automatically be added as job materials, ensuring that the job cost report accurately reflects the cost of materials ordered for this job.
Once received into inventory, job resource materials will then be added to your job’s picking list.
Job Purchase Orders vs Regular Purchase Orders
When a purchase order is created for a specific job (ie. it’s a job purchase order), any materials added to it will automatically be received into inventory assigned to that specific job, even if it was not added via pending items or assigned to an existing job material.
Additionally, job materials will automatically be created when the purchase order is received, ensuring that the job cost report is kept accurate when materials are received for that job.

The primary difference between a job purchase order and a regular purchase order is that they cannot contain any materials assigned to stock, or other jobs. This means that when adding pending items to an existing job purchase order, you will not be able to add low-stock materials, and will be restricted to adding pending items for the selected job.
If you convert a regular purchase order to a job purchase order, any materials that were assigned to “stock” will automatically be assigned to the selected job. Similarly, if you convert a job purchase order to a regular purchase order, any materials that were not added via pending items (such as those added directly to the purchase order) will be reassigned to “stock”.
Creating a Purchase Order for Stock Items
If you need general items that are not for specific jobs, or if your business prefers to bulk-order stock items which are allocated to jobs over time, follow these steps to create a purchase order:
- Go to Purchase Orders and click Create.
- Choose a supplier from the drop-down.
- Enter a reference (optional).
- Select a location for the order to be delivered to.
- Click Create again.
- You will be shown a draft of your PO. Enter a delivery date.
- Choose a template from the drop-down, if applicable.
- Enter any delivery instructions or notes, if applicable.
- Add items to the PO (see below).
- Click Add New and choose either Material or Service:
Material: You can type in a new material or product that is not currently set up in your catalogue. Once you receive the PO, the material will go into your inventory.
Service: You can type in a new material or product that should not be set up in your catalogue. Once you receive the PO, the material will not go into your inventory. This is considered a sundry line.
Example: A stationary order for pens would be entered as a service, because you don’t need to add these to your inventory.
You will be taken to a new screen to enter the details of the material/product.
- Enter either the Item Quantity or number of Units (required). Note: these fields will recalculate automatically depending on what Units per item is set to.
- Edit the Location and/or Bay Location if applicable.
- Name the material (required).
- Select a Supplier or add a new supplier (optional).
- Enter the SKU and/or barcode (optional).
- Select a Category or add a new catagory (required).
- Enter the Brand/Range/Finish/Colour (optional).
- Enter the item dimensions (optional).
- Enter the Price, Units per item, and Price per unit (required).
- Click Create.
You will be taken back to the draft PO, where you can add more items if required.
Once you’ve added all your items, click Save Changes.
From here you have the option to email, print to PDF, export as a CSV, or invoice the PO as shown below:

Please Note: Whether or not you can see the Receive and Split options depends on how your purchase order statuses are set up. You cannot fully or partially receive a PO just by updating the status.
Automation: Once you email the purchase order, the status will automatically update to Sent.
Recommended Process for Bulk Ordering Items from Suppliers
Jobman is designed so that purchase orders are created at the moment they are ready to be sent. Rather than create a purchase order at the beginning of the week, spend days adding to it, then send at the end of the week, our recommended process is:
- Set up your jobs, and add materials to them throughout the week (or as needed) – remember to click ‘Source’!
- Once all jobs have materials added to them and you are ready to send a purchase order, you can then create a purchase order and add all pending items to it for that particular supplier.
- Jobman will automatically allocate the items in the purchase order to the specific jobs they are intended for.
- Once you’ve created the PO and added all pending items, you can also add stock items if desired.
- Send the PO.
How to Send a Purchase Order
Sending a Purchase Order as an Email
To send a purchase order as an email, follow these steps:
- From the User Menu Panel, navigate to Purchase Orders.
- Click into the purchase order you want to send. (Note: you must choose a purchase order which is in the Created status.)
- Click Email:

- Make any desired changes to the email:

- Click Preview > Send.
Automation: When you email a PO, its status will automatically update to Ordered.
Converting a Purchase Order to PDF or CSV File
To convert a purchase order to PDF or CSV file, follow these steps:
- From the User Menu Panel, navigate to Purchase Orders.
- Click into the purchase order you want to convert.
- Click either PDF or CSV:

- You can then download the new file and send as an attachment when you email your supplier.
- Make sure to update your purchase order status by clicking on the status, then choosing Ordered from the drop-down:

