Skip to content
Jobman AcademyJobman Academy
  • Academy
  • My Account
Jobman AcademyJobman Academy
  • Academy
  • My Account

User Control and User Settings

Home » User Control and User Settings
Breadcrumb Abstract Shape

User Control and User Settings

  • February 20, 2025
  • Com 0

Back to: Complete Jobman Set-Up Guide for Administrators

0

Set Up Your Organisation – General Settings

Once your organisation has been created, you will need to configure all your settings.

From the User Menu Panel on the left, navigate to Settings > General.

Here you can perform the following:

  • Add a company logo which will show on quotes and invoices.
  • Add the company email address, ABN/TRN (if applicable) and website details.
  • Set your currency, language, date format and timezone.
  • Set your financial year start date.

Uploading your logo: We recommend that your logo file size does not exceed 500kb. Large logos can cause your emails to exceed file attachment limits.

Important: You must have the correct timezone set up for your organisation. This will affect multiple areas of your software, such as your target calendar and activity screens.

When you create a new staff member, their timezone will be set to your organisation’s by default. However, you can alter the timezone for individual staff by navigating to Staff > [Staff Name] > Update.

Creating and Editing Locations

Many businesses have multiple locations (e.g. manufacturing facilities, factories, warehouses, etc.)

By setting up locations in Jobman, you can create different delivery addresses for purchase orders, and separate your inventory according to location.

Example:

Factory 1 is located at 11 West St, and Factory 2 is located at 23 North St.

Factory 1 has 125 sheets of while melamine in stock, while Factory 2 has 50.

Please note: The number of locations you can have is based on your subscription package. You will need to update your subscription to add extra locations.

How to Add a Location

  1. Go to Settings > Location.
  2. Click Create.
  3. Enter your location name. For example: Warehouse 1 or Warehouse 2.
  4. Enter the location address.
  5. Click Create again.

Edit, Delete, or Set Location as Default

To update the name or address of an existing location:

  1. Go to Settings > Location.
  2. Select the location you want and click Update.
  3. Enter the new details and Save Changes.

You can also Set as default to make your chosen location the default delivery address for purchase orders:

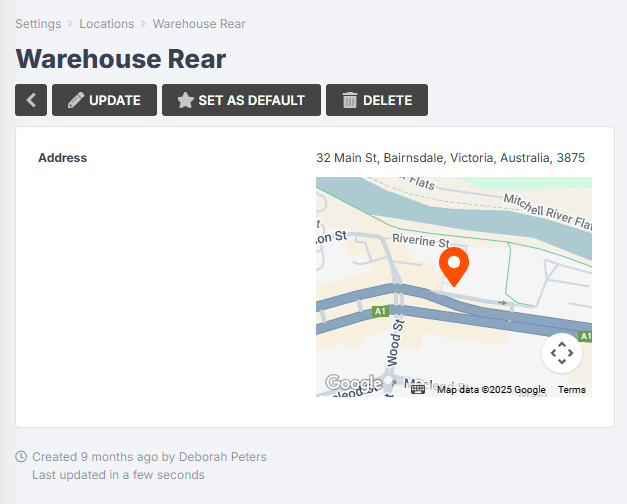
If you no longer use a location, you can Delete it using the button shown above.


Previous Lesson
General Navigation
Lesson 1 within section General Navigation and Usability.
Next Lesson
User Licenses and Staff Types
Lesson 3 within section General Navigation and Usability.

Course Syllabus

  • General Navigation and Usability
    • General Navigation
    • User Control and User Settings
    • User Licenses and Staff Types
    • Staff Roles and Permissions
  • Getting Started
    • Connect to Your Cloud File Storage
    • Connect to Your Accounting Software
    • Setting Up Your Staff
    • Setting Up and Managing Staff Login Details
  • CRM Management
    • How to Add Contacts
    • How to Manage Contacts
    • Contact Types, Roles, and Sources
    • Contact Emails and Resources
  • Lead Management
    • What is a Lead?
    • How to Create a Lead Workflow
    • How to Create a Sales Labour Centre
    • How to Create an Agenda Screen for Your Sales Team
    • Lead Settings: Types and Statuses
    • Lead Settings: Details
    • Lead Settings: Members and Member Types
    • Create Lead Item Types and Specifications
    • Automated Triggers in Lead Workflows
    • How to Create a Lead
    • How to Manage and Edit a Lead
  • Job Management
    • How to Create a Job Workflow
    • Automated Triggers in Job Workflows 
    • Job Settings: Types, Statuses, Details, and Members
    • How to Create Labour Centres for Your Jobs
    • How to Create Agenda Screens for Your Jobs and Staff
    • Understanding Your Capacity
    • How to Create a Job
    • How to Manage and Edit a Job
    • How to Create a Work Order from a Job
    • How to Use Your Target Calendar
  • Kiosk
    • How to Set Up Kiosk Staff Working Hours
    • Overview of Kiosk Mode Functions
    • How to Create Agenda Screens for Your Kiosk Staff
    • Staff Member Types and Automated Task Allocation
    • How to Create Activity Screens for Your Staff
  • Quoting
    • The Four Levels of a Jobman Quote
    • How to Build Products
    • How to Create Styles and Range Options
    • How to Build Quote Presets
    • Quote Templates
    • Quote Statuses
    • How to Create and Send a Quote
    • How to Refresh Quote Pricing
    • How to Copy and Revise Quotes
    • How to Create, Send, and Sync Invoices
  • Catalogue Management and Inventory
    • Catalogue Settings
    • Setting Prices and Measurements for Catalogue Materials
    • How to Create and Import Catalogue Materials
    • How to Create Catalogue Services
    • How to Add and Manage Inventory Items (Stock)
    • Price Matrices
  • Purchase Ordering and Inventory Picking
    • How to Create Purchase Order Statuses
    • Managing Job Resource Materials
    • How to Create and Send Purchase Orders
    • How to Manage, Edit, and Receive Purchase Orders
    • Picking List and Inventory
    • How to Set Up Minimum Stock Quantities for Purchase Ordering
    • Supplier Integration – Hafele
    • Supplier Integration – Wilson & Bradley
  • Reporting
    • Reports in Jobman
    • Quote Summary Report
  • Job Alerts and Forms
    • How to Create and Use Job Alerts
    • How to Create and Use Job Forms
  • Payroll Set-Up and Time & Attendance
    • How to Set Up Staff Pay Rates
    • How to Log Staff Time and Attendance
    • How to Log Staff Leave, Public Holidays, and Temporary Business Shutdowns
  • CAD/CAM Integration
    • How to Connect Your CAD/CAM Software
    • Cabinet Vision
    • Mozaik
    • Microvellum
    • Winner Flex
Copyright 2025 Jobman Pty Ltd. All rights reserved.
Jobman AcademyJobman Academy
Sign inSign up

Sign in

Don’t have an account? Sign up
Lost your password?

Sign up

Already have an account? Sign in